Updated: Aug 01, 2019
Share!
How To Mix And Master Video Game Music
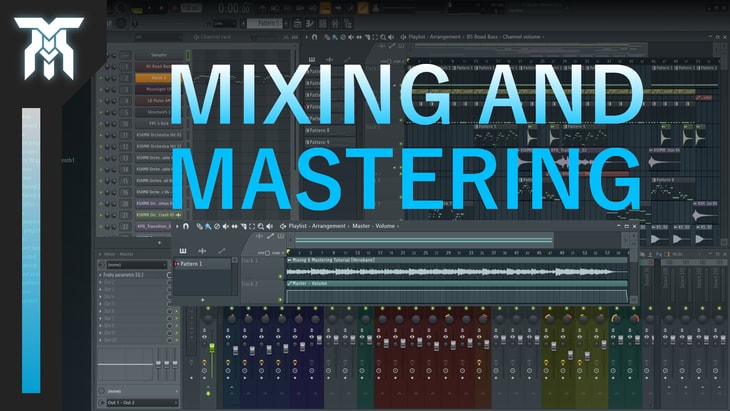
Ever wonder how to mix and master video game music? This mixing and mastering tutorial is going to break down the basics of how it's done and some of the key things that are involved in this process.
In the first section, we’ll go over mixing and after that, there will be a part about mastering.
Just remember, you don't need to do everything mentioned in this tutorial to achieve a good mix and master.
Even if you’re comfortable and are able to mix music and sound effects, you might still want to skim past to see if there’s something new!
Mixing Video Game Music & SFX
Mixing is almost always done alongside the entire process of composing a song. And at the end, you can make final adjustments before rendering the song and moving on to mastering.
This all involves setting up the position of the sounds in your music and shaping their frequencies.
Whether it's depth through the use of reverb and delay, width through the use of panning and stereo enhancers, volume balancing through the use of faders and compression, or shaping the sounds by using an equalizer (known as an EQ).
Volume Balancing
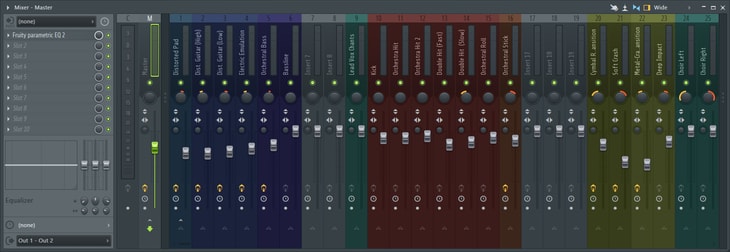
Okay, let's talk about volume balancing first as it's going to impact everything else in the mix. The first part of this is simply using the faders, which are the parameters on the mixer rack that control the volume of each individual track.
The objective of doing this will be different depending on what kind of music you're making and how you want it to sound. This can change throughout the soundtrack too by using automation.
Essentially, this is done to establish a hierarchy of dominance across the elements in your composition. It's not going to take huge changes in volume to shift the focus from supporting ones to the leading sound.
They key is to order everything in a way that represents its importance in the song but also keeping everything in a reasonable range of volume so nothing pops out too much.
Compression & Limiting
The other side to volume in mixing comes down to compression and limiting. What this is often used for is to let you shape individual sounds that have a fixed volume, such as a kick drum.
At the beginning there is a higher volume - known as the transient - and it gradually fades down.
By applying a compressor to this, you are given the ability to lower the intensity of the highest peaks which will, in turn, make the lower sounds, louder.
Here’s a resource if you want to learn what everything does in a compressor.
Panning & Width
Next up, we've got panning. In the case of video game music, you also have to consider how it may alter the perspective of the player and how certain sounds effects are panned depending on where they're coming from on screen.
Remember that these aren't rules you must follow and you really don't have to pan everything.
Now for orchestral music, you can reference the arrangement of musicians in a typical orchestra for a better understanding of where to pan each instrument.
For other genres, elements that are best to be centered (which is just not changing the panning position at all) would include vocals, bass, and most percussion such as the kick, snare, and hi-hats.
Going a bit further from the center, you can pan leading instruments.
Anything past that is good for crashes or cymbals, and backup vocals (which could be choir).
If you are going to pan things, it's important to balance what is heard on both left and right so it doesn't sound unbalanced.
Reference In Mono
One more thing I'd like to mention about panning is that it's good to reference your track once and a while in mono.
This will give you a better understanding of how it may translate to devices that only use mono or just don't have much width like laptop speakers.
There's also the benefit of being able to pick up on phasing issues a lot easier when compared to listening in stereo.
Depth
Alright, so the depth of the mix is achieved by using effects like reverb and delay. This simulates the environment that your music is played in, whether it's a huge stadium or a smaller room.
The basics of it is the more reverb you apply to something, the further away it will sound. The less you use, the closer it will sound.
An important thing to do when using reverb for mixing is to use just enough to emulate the depth you want and to keep the decay time low so it's not ruining the dynamics by creating a wall of reverb.
It's also good to use a high pass filter on the reverb signal and to keep it away from sounds that occupy the low end of the frequency spectrum.
This is due to reverb making lower frequencies sound muddy, which is just when everything is blended together and not really clear - kind of like a wall of sound.
As for delay, it's the feedback that you'll want to pay attention to and using lower delay times can make it sound more like reverb.
I go into much more detail about these two plugins in these two articles:
Equalization (EQ)
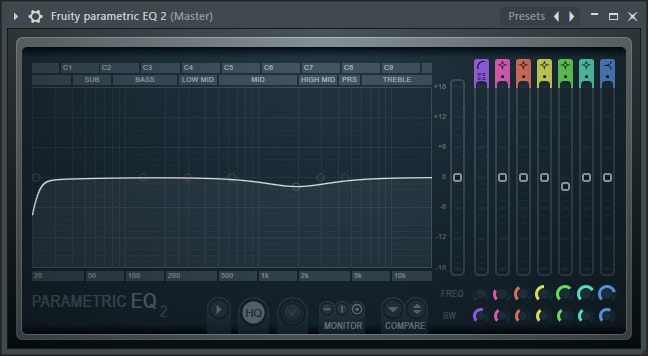
Finally, time to go over EQ (or equalization). This is no more than volume control over specific frequencies.
Generally, you'll want to stick to reducing frequencies for the most part as increasing them is just turning everything up and you'll have to spend more time balancing the volume again.
Now rolling off everything below 20 Hertz with a high pass filter is going to give your mix more clarity as anything below this more felt than heard.
As for the higher frequencies, you may not want to roll off what's above 20 thousand Hertz for sounds in that area. Although it may not be heard, it can interfere with the quality of the sound.
Now, with lower sounds like bass, you probably should roll off the high end, and like most high and low pass filters, move it until you start to hear a difference and then ease back until there isn't much of a change in the sound.
This really helps with cleaning up some of the less important elements of a sound.
Another reason to EQ is to carve out sections where many sounds are being played at once, so everything can fit together while still standing out themselves.
Simply look for what's most important in a sound and shape other sounds around it.
The majority of EQ should be done with subtlety though unless of course, you're dealing with sound design.
Again, I also wrote a tutorial on what everything does in a parametric EQ if you wanted to dive deeper.
Communication & Collaboration
That leads me to something easily overlooked when mixing video game music.
Don't forget about the sound designers in a project, even if that's you.
When making all of these changes, have good communication with the sound designer and make sure to account for the EQ and panning decisions they make, not just your own.
This will help everything fit together and make the game sound much better.
Reference Track
Finally, to take it a step further you can reference a professional mix.
By taking a finished song whether your own or one you really like that's similar in style, you can get a better perspective of where your mix stands and if you need to make any more changes.
When comparing to other tracks, they'll probably be louder since they have most likely been mastered already.
Make sure to match the decibel level of each so you're not deceived by the loudness of the reference.
Mastering Video Game Music & SFX
Alright, time for mastering video game music and SFX. This part of audio production isn't too different from the mix so I'm gonna go over this quickly and it shouldn't take too long if you did a good job mixing the track.
Mastering is more for final touches and for setting an appropriate decibel level depending on the platform you'll be releasing it to. More on that later.
Volume Fading

A good place to start is Fade in and out where there is no sound heard to make sure there is no clicks or pops when the song begins and ends.
This additional automation shouldn't change how the composition already sounds, so you'll be making these changes over a very short amount of time.
Minor EQ Adjustments
Now, if you notice something a bit off in the frequencies, you can make small EQ adjustments IF NEEDED.
This is to be done with subtlety as this will affect the entire song, not just the elements you are focusing on. Try to keep these changes to about 1.5, maybe 2dB at most.
Additional Effects
Some additional effects you can add to make your track slightly better is saturation (can be a distortion plugin), stereo widening, harmonic excitement, and some compression.
If you do end up using these, make sure to be subtle with it and if you don't know what you're doing, be cautious about using them at all. Try experimenting though.
Loudness Standards
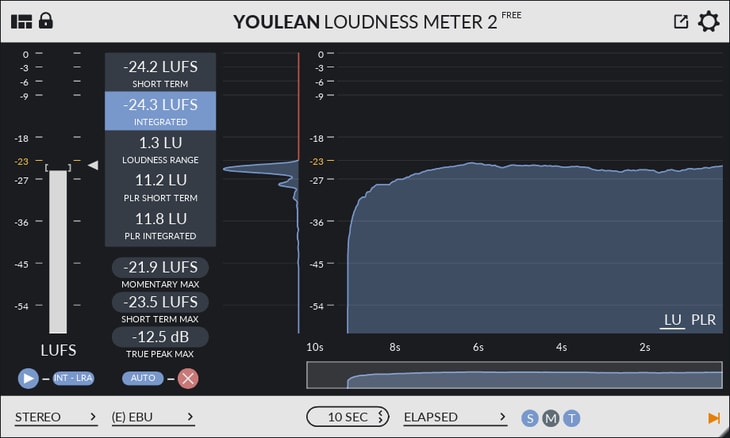
Now, this next step is especially important to stick with the industry standards for loudness. By using a free plugin to monitor loudness we can dial in the proper value for different platforms.
For video games, it's best practice to keep it around -23 LUFS to meet most country's standards.
If you're going to be putting this Original Sound Track (or OST) up on a streaming site such as Spotify, generally keeping your track around -14 LUFS is best.
You want your soundtrack to be commercially loud so when played in contrast to other songs it sounds good and not super quiet.
Levels higher than -14 LUFS are likely going to be compressed which may ruin the dynamics of your song.
Reference Track
Again, bring up that reference track (can be the same one as in the mix or a different one) that's already been mastered and gain match them to have a fair comparison.
Now, you're not trying to copy it, just use it as a way to gauge your progress. If you're comfortable with how it stands up against it, you should be good to go!
With the basics of mixing and mastering down, you should focus largely on the arrangement and composition of your music. It's where the greatest impact is made and the production side of things is simply where the quality of what you've made already, can be increased.
If you found this mixing and mastering tutorial helpful, please share it with someone so they can learn about this too! As always, thanks for reading.
Featured Post
Share!
Join the newsletter for free stuff and some knowledge too!
Everything you need. No Spam. A heads up before others do.


