Updated: Aug 01, 2019
Share!
How To Use Gain Staging To Get A Better Mix
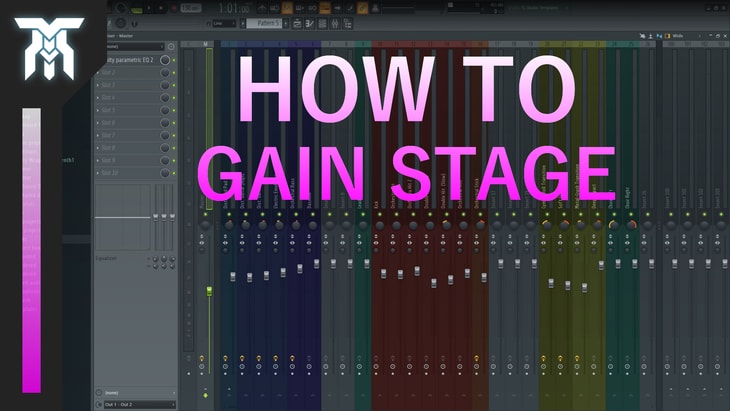
If you're unsure about what gain staging is or why you should be doing it, this tutorial will teach you how to use gain staging to get a better mix.
Stick around, because I'm going to be talking about what you can do in your DAW, as well as your plugins to properly set up gain staging.
First, I'm gonna talk about what Gain Staging is and why you might want to do it. Then, I'll be going through the process of how to do it.
But don't let gain staging intimidate you. This process really is just setting levels so nothing is distorting on its own or when summed together in the master.
And it's also done to make it easier to adjust levels in the mixer, which I'll explain why later on.
The Main Reason to Gain Stage
Okay, the main objective of gain staging is to ensure that nothing is clipping, which would be reaching a decibel level of anything 0 dB or higher.
Pretty much all audio software (including plugins and DAWs) will let you know that your signal is clipping when you start to see red on a decibel meter.
But, it's not always this obvious, you might be just Barely skimming 0 dB, and that can be enough to cause distortion.
A quick tip, it's okay to move your fader past the 0 dB marker but what shouldn't is the actual signal volume.
And when dealing with many tracks or sources of audio (including mix buses), the decibel level of all of these will add up and can cause distortion that might not be noticeable on their own but can be more obvious when they combine into the master track.
When to Gain Stage
That is the reason you don't want to clip. Distortion can ruin a really good mix and it's best to do it right away as it can be hard to figure out why your mix doesn't sound good later on.
Especially after adding a bunch of elements and making a lot of changes in your project.
Not to mention, you might be making adjustments or adding in effects that won't sound the same if you gain stage after the fact.
This is because if a signal is clipping before it hits the mixer, it will go into the effect plugins, distorted.
But, I would recommend not starting this process until you get a good idea down that you want to stick with so you don’t gain stage a project that will never get finished.
When it comes to recording live though, it is critical that this is the first thing that you do as it kind of sets it in stone once it's recorded, much different than the flexible nature of digital audio.
Now, you might be wondering what a good decibel level is to set everything to.
Although there isn't one answer to this, I can give you a range to aim for.
The actual value doesn't matter too much, as long as it's well below 0 and is consistent throughout your project.
It is, however, common for people to go for anything from -10 to -18 dB.
This is so you have a lot of headroom for when all of the track's decibel levels combine in the master track.
And you should try to have your master decibel level at least -3 or lower. If you can, -6. Some people even go as low as -10.
This is to leave space for mastering your track.
Where to set Decibel Levels
Okay, time to go over where you need to be setting up your levels to properly gain stage.
Starting from the source, most virtual instruments will come with a master output level.
When they do, you don't need to worry about pre-gain and can even slam it to 100 if you properly gain stage in the plugin.
Like I said before, you should bring it down to -10 to -18 dB.
An important thing to remember is that the faders in your mixing console change the volume after the signal has gone through the effect plugins.
This is why you need to pay attention to "pre-gain" or "clip-gain" in the case of audio files to ensure the sound isn't distorting before the effects are applied.
In FL Studio, the pre-gain is called "channel-volume" and the name can vary across different DAWs.
A good place to have your pre-gain at, is again, around -10 to -18 dB and going lower than this level won't make your mix sound better, it's just a safe range to stick to.
Applying Makeup Gain
If you find you are pulling a fader down too far, you can just add a plugin that controls gain to compensate for the level it's down to so you can bring it back to 0.
For example, if you need the fader at -20 dB, you can increase the gain to +20 dB in the gain plugin.
And there you go, the end result should leave your mixer faders as high (or as close to 0 dB) as possible and will make mixing much easier.
This is because the change in the decibel level vs how much you move the fader increases substantially the further you drop it down.
And if you look closely, you'll notice how much this really starts to get out of control.
This can make it very hard to fine-tune your levels, as small changes can dramatically impact the volume the further down your faders are.
The best way to make sure you're not clipping after that is to generally mix at a low level and if it's too quiet for you to hear, don't use your master fader to turn the volume up.
Instead, you can use the knob on your speakers, headphones, or audio interface.
Final Thoughts & Conclusion
So, to wrap it up, the most important things to pay attention to when gain staging digital audio are these.
- Don't clip (or pass 0 dB) on any individual track (including the master). Or, before the sound reaches the mixer by setting the right pre-gain when using audio files or in the plugin itself when dealing with virtual instruments.
- Optimize your fader positions to make it easier when mixing your tracks. This can be done by using effect plugins that have the ability to control gain.
- Your levels should be around -10 to -18 decibels before they hit the mixer and it doesn't have to be in this range, it's just a safe place to be.
When in the mixer it doesn't really matter where your levels are at, as long as they don't hit 0 dB.
The master track, however, is good to sit at around -3 to -6 dB so there is enough room to master the track.
I hope this tutorial on what gain staging is helped you understand how to use it to create a better mix.
If you have any questions, let me know in the comments below. As always, thanks for reading.
Featured Post
Share!
Join the newsletter for free stuff and some knowledge too!
Everything you need. No Spam. A heads up before others do.


