Updated: Aug 24, 2019
Share!
How To Sidechain in FL Studio 20

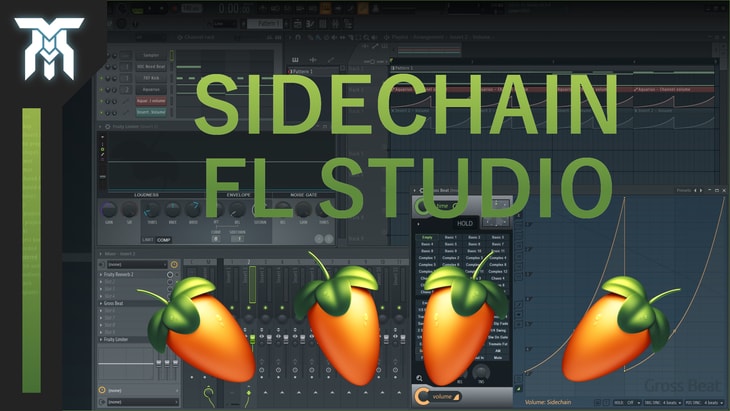
Learn how to sidechain in FL Studio 20 with this sidechaining tutorial.
With sidechain compression, you can make your leading elements stand out while ducking the volume of other sounds that are played at the same time.
If you're wondering what sidechaining is and how to use this mixing technique on drums, vocals, and other sounds, this tutorial will show you why using sidechain compression can clear up your mix and even create a pumping sound.
What is Sidechaining / Sidechain Compression?
First of all, sidechaining is more professionally known as sidechain compression as its true way of doing this is through a compressor.
What it does is it will compress one sound whenever another one is present.
This can be as short as a kick drum or as long as a phrase in your vocals, but really, there's no limit to this.
Now, let's get into 3 of the many ways you can be applying sidechain compression throughout your mix.
Method One: Using a Limiter
The first way is by using a compressor and is the most versatile way to sidechain sounds with different lengths, not to mention it's automated.
Go to the mixer track of the sound you want to lower in volume and apply a compressor onto that.
Then, go over to the mixer track of the source you want to use to trigger the compressor and route it over to the track you want to duck in volume.
Depending on whether or not you want the triggering sound to be heard, such as using a Ghost Kick, you can take two approaches to this.
A Ghost Kick is just a kick drum that is not sent to the master (i.e. not heard).
You can either use "sidechain to this track", which will keep the sound audible or "sidechain to this track only" which will silence the triggering sound but will still activate the compressor whenever it is present.
Then, depending on the mixer track of the sound you are using to trigger the compressor, select it on the sidechain input option.
To set up the sidechain to make a pumping sound, lower the threshold to anywhere below -30dB.
Next, you'll need to raise the ratio to anything higher than 1.5.
Taking it further, you can move on to the envelope and noise gate to further refine the way the compressor works.
As a side note, you may want to learn what all of the parameters do on a compressor/limiter.
Method Two: Volume Automation
The next way to do this is a pretty dirty way of doing this and is through volume automation.
This is really only practical for letting percussion or repetitive sounds through or for a sound effect.
If you want to let effects like reverb or delay tail off while ducking the sound, create an automation clip of the channel volume.
If you want to completely silence the effects as well, automate the mixer track volume.
Once you have these automation clips set up, you can go into the playlist and change the pattern of automation.
Method Three: Gross Beat
The last way is probably the easiest for a specific pattern of sidechaining and is done with Gross Beat.
Once you have it on the mixer track you want to pump, go into the effect plugin and down to the sidechain option.
You can take it further by changing the automation clip here if you wanted to make a different pattern or change the intensity.
One of the reasons you might want to start using this technique is that it can make your mix sound much better when used with subtlety.
Sidechaining allows important elements in your mix to stand out while not sacrificing the volume of something else, especially if it's a leading element.
I hope you enjoyed this tutorial on how to use sidechain compression.
If you did, don't forget to share this with a friend and subscribe on YouTube!
As always, thanks for reading.
Featured Post
Share!
Join the newsletter for free stuff and some knowledge too!
Everything you need. No Spam. A heads up before others do.


