Share!
How To Use A Chorus Effect
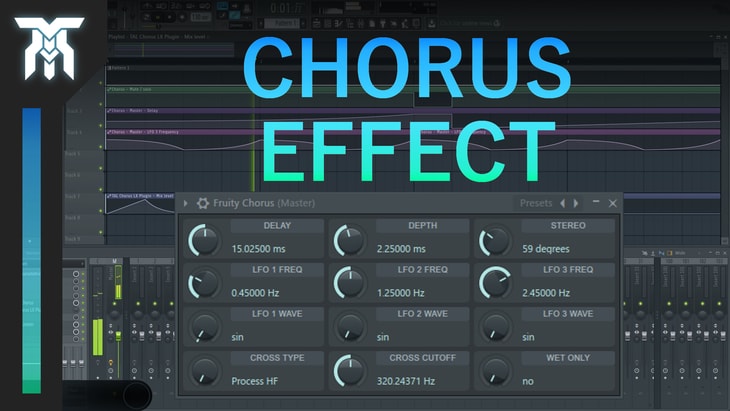
If you're wondering how to use a Chorus effect, this tutorial will help you understand any chorus plugin thrown your way. Even if you're just curious about what certain things mean and what they do, stick around!
Chances are, not everyone will be using the exact same chorus effect plugin in their DAW and that’s good! You don’t have to worry about compatibility for the most part, as you’ll soon see, the parameters and techniques in this chorus effect tutorial are quite universal and can be applied to many plugins out there.
What Is A Chorus Effect & Why Use It?
What a chorus effect does is it takes an individual sound and replicates it with a very similar pitch and time. In its most basic form, a chorus effect is when multiple sounds that are practically the same are played together to sound like one.
A reason why you might use a chorus plugin is to make a single instrument sound like several, really thickening the sound and even adding warmth. You can also use it to create really interesting sound effects, which will be mentioned in the techniques section below.
If you would rather watch the video than reading, you can watch the video here, which includes examples of what each parameter does to a sound.
Chorus Effect Parameters
Delay: First up, the delay parameter. This part of the effect makes the delay more or less noticeable but isn't quite as powerful as an actual delay plugin. It does this by controlling how much of the delayed copy of the input (or sound) is mixed with the original input signal. This is usually modulated by an LFO (or a Low-Frequency Oscillator). The value of this feature is in milliseconds and the more delay you use, the wider the sound will be.
Depth: The next part is the depth. This determines how deep (or far) the sweep of the delayed sound will be, essentially setting limits on how far the modulation will reach. This gives the sound a phaser-like characteristic.
Rate: The rate is a pretty simple feature that may come with your chorus effect. All this will do is set what frequency the modulation will be at. If you look at a waveform, the higher the pitch, the faster a wave will oscillate up and down.
Feedback: Feedback changes, well, the amount of feedback. Look, I didn't name these parameters. This is how much of the affected signal is fed back to the unaffected signal, making the tail of the sound longer or shorter. It can be used to make flanging effects, depending on where the delay is set to.
Dual Mode: If your Chorus effect has this option, using the dual mode will typically double the already existing process your plugin uses to effect a sound. When turned on, the chorus effect will make a richer and thicker sound.
After doing some research, I couldn’t find out how this works in regards to an effect chain. Does it split the signal, sending it to two of the same exact chorus effects, or does it send the original signal through one chorus, then the processed signal from the first chorus into a copy of it, then to the master? If you know anything about this, let me know in the comments below. This is quite confusing.
Width: Controlling how the output signal will interact with a playback device (like headphones or speakers) is done through the width parameter. You can choose to create a mono signal or a stereo signal and anywhere in between. Setting it to 0 will put it in mono, which is the same signal sent to all speakers. As you turn it up, the stereo width will increase, widening the sound.
Dry & Wet: The last part of the chorus effect is the dry and wet value. As with pretty much all plugins in audio production, this determines how much of the original sound will be mixed with the affected sound in regards to gain (or volume). When referring to dry in audio it means a signal is unprocessed and in this case, it's essentially bypassing the chorus.
The wet signal determines how much of the effect is applied to the output. When it's 100% wet, the output of the signal will only be what is processed by the effect, preventing a dry signal from continuing through.
Now, this does depend on whether or not your plugin has separate dry and wet controls. If they are separate, they can both be at 100%.
Chorus Effect Techniques
You can make warp-like effects if you automate dramatic changes in the depth parameter. Slam the feedback level up to roughly 90%, set a 40ms delay and dial in the chorus rate to about 0.07. Once this is done you can make a huge spike in the chorus depth at the end of the sound to give it an energy discharge.
Create realistic forcefield SFX by applying a chorus plugin to white noise. You can start to see some results by setting the width and wet parameters to 100%, and feedback to around 85%. Play around with the delay, rate, and depth to get to the result your after. Don’t forget to experiment with sounds other than white noise!
That's the essentials of what a typical Chorus plugin will include but not every one of them has all of the effects listed. You should now be able to open up and know how to use a chorus effect for sound design or in music, even if you've never touched it before. If you enjoyed reading this tutorial, check out more "how to use audio effects" on the blog. As always, thanks for reading!
Featured Post
Share!
Join the newsletter for free stuff and some knowledge too!
Everything you need. No Spam. A heads up before others do.


