Updated: Mar 15, 2019


Share!
How To Make A Sound Library In Any DAW
If you want to make a sound effects library or sample pack but don't really know how to go about it, this tutorial will show you my process from start to finish.
I'll be going over how to make and record sounds at the industry standard and adding metadata to make it easier to search for your sounds in a DAW.
After that, packaging, where I'll talk about making cover art, a demo track, and other files you may need to include in your library.
Finally, I'll point out some great websites where you can sell your stuff, so stick around.
Software For Making A SFX Library
To dive right into it, there are some main things you should set up first to make a high-quality sound library.
First, you may want a large dB (or decibel) meter to see the precise levels of each sound or sample you make.
This will help things be uniform across the entire library and if you set it as low as around -80dB, you'll have a much clearer understanding of where to make your edits at the end of a sound.
Then you'll need something to record with and add fade points to prevent pops and clicks. Personally, I love to use Edison for this as it makes the whole process a lot easier.
When it comes to a recording plugin, I like to have multiple instances of it so I can hold variations that I'm not sure about.
So, if I recorded 12 versions of a sound but can only keep 6, I want to be able to move on if I can't decide.
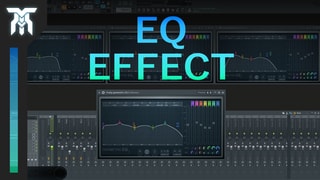
The last few things you might want are an EQ to roll off anything below 20Hz to give your sounds clarity (as anything below that isn't really heard).
A Limiter to prevent clipping (even though you should typically aim for a level around -1 dB but I'll go anywhere between -2 and -4 while just keeping it turned off until I need it).
Lastly, you might want a notebook or another text editor inside your project file so you can keep track of ideas and remind yourself of the standards you have for the library.
How To Set Up Your DAW
Then, you'll need to set up your DAW to work in the right quality depending on what you're making. To do this, go into the options or preferences menu and then to the audio settings.
For sound effects libraries used in media like games or film, it's kind of the standard to use a sample rate of 96kHz and a bit rate of 24-bit.
Anything higher than that is just not worth it for the amount of space it takes and the quality past that is marginal at best. I don't even think it's something that can be heard.
Oh, and I use 120 Bpm since it makes timing really easy, every bar is 2 seconds and the intervals between them are a quarter, half, and one second long.
Creating Sound Effects For A Library
Now for the fun part, let's make some sounds. Keep in mind that a lot of plugins legally prohibit you from using their presets in sound libraries.
That means you're not allowed to record them as is and put them in your pack, even if you don't charge money for them.
If you really don't know much about making your own sounds, you can learn a lot about synthesis by deconstructing sounds and essentially "reverse designing" a patch.
But don't reverse engineer the plugin, cause that's illegal too.
Just take away effects or drop parameters off one at a time, observing how it changes the sound.
How To Record Sound Effects
With the setup and sounds ready, you can start to record what you've made.
The more you and the customer have to work with the better, so set up loop points in the sequencer or piano roll to record the tail of the sound too.
Once recorded, I like to make it fade in and out very quickly to make sure it doesn't click or pop when the sound starts or finishes.
I try to keep this at 0.1 seconds or less, depending on how it affects the sound.
If you're going to be making drones or ambiances, the standard length is set at around 30-60 seconds. Although you can get away with shorter sounds at around 15-30 seconds if you make them seamlessly loop.
Now, for sounds other than that, it's good to get a few variations of each sound so things don't get too repetitive, like footsteps for example.
There's no real standard for this, but anything between 3 and 6 should be great. This could be with slightly different parameters on your effects or synths.
It really comes down to the sound and its typical use case in a game or film.
You can either keep them all separate or merge the variations into the same file with a small space between each (can be anything but a quarter or half a second should be okay).
Before you press record, make sure the average decibel level of the sound is uniform to the rest of the library.
Once you've recorded the sound, it's good to keep the file short and without much silence.
What I mean by that is after the sound has played and the tail has faded out, you should remove the rest of the recording to keep the file size low.
Finally, export your sounds to the same folder and verify that the bit rate is still at 24-bit.
OGG is a good format for keeping the size low but everything can be converted to that later. What's important is having the highest quality possible, which is a WAV file in this case.
Alternative To Creating Audio Files
Now, if you didn't get a chance to set up the proper levels on sounds you've already exported, there is a fix.
Load up all your sounds into a project on their own track in the playlist and in the mixer. From there you can adjust the decibel level to the same amount to keep things consistent.
Again, you don't want to slam everything to 0dB. Instead, keep it around -2 and -4db.
You can also throw in some other effects like EQ and compression on individual tracks to fix up some sounds that are a bit off.
Just keep in mind that it's a lot more efficient for you to fix something than it would be to leave it for every customer to fix it on their own. Not to mention, it's better for your brand's reputation.
If you end up doing it this way, you'll need to export each track individually.
If you're using FL Studio, you can simply right click on the playlist track, then down to "consolidate this track", and then "from track start".
This will automatically select the exact length of the individual track, regardless of how long or short others are.
How To Add Metadata To Sound Effects
As the final step to making the actual content in a sound library, it's great to add metadata to each sound to make it much easier for whoever uses the pack.
There's expensive software like Soundminer or FREE software like Soundly that you can use to add this in.
The most important field you should be using is the description to describe what the sound is - usually done with keywords separated by commas so it can be easily searched.
This could be the genre, the kind of sound such as "pulse" or "sweep", and even things like "music" or "loop".
"Originator" is a helpful one to market your brand so people can find the rest of your content and I like to use "note" to highlight my website and social media handle but can be used for anything.
And then there's "category" to explain what the sound is with an umbrella term such as ambiance, game audio, or even the name of the sound library or sample pack.
How To Package A Sound Library
Now we can move on to the packaging of the library and this part is just as important.
First I'll go over making the cover art, then a demo track, and finally some extra files to add into the pack.
Making The Cover Art or “Album Art”
Alright, if you're not that artistic, you might want to pay someone to make your library artwork on a site like Fiverr or 99designs if you want it cheap.
If you're feeling artistic and want to do it yourself, you can start by getting some artwork for free by going to a royalty-free stock photo site such as Unsplash or Pixabay.
Once you find a CC0 - preferably non-attribution photo you can load it into a free visual editor such as GIMP.
Cover art is typically 600x600 pixels so set it up for that and then move in some rulers to help keep things on point.
If you want a quick and easy way instead, there's a website called Canva that comes with templates.
Just pick the CD cover and either use what they have or drag in a photo. From there it's just a matter of putting in the text if you want it.
Making A Sound Library Demo Track
Time for the demo track to highlight what your pack has. The length of this track is going to be relative to the number of sounds that are in your library - And, how long each sound is.
This should be anywhere between 1 to 5 minutes long and should be ordered along the lines of best to worst, all while showing your best work in it.
Basically, you're not trying to showcase every single sound included, just enough to get your point across and show its capabilities.
If you're not a composer you can go and pick up an ambient track from a stock music site like Audio Jungle or Audio Network.
Just remember to read the terms and conditions, making sure you can use it in this way.
If you're also a composer, making your own soundtrack is more than ideal.
Keep things simple as to not take away attention from the sounds you're trying to sell (or give away for free, depending on how you price it).
Make sure it's consistent with the theme of the pack too.
To wrap it all up, put everything in the same folder - and you don't have to put the demo track in there, you probably shouldn't anyway.
It is good to include any legal information into the library as a simple text document explaining the EULA (or End User License Agreement).
You are, after all, selling the license to legally use your sounds.
You can name this file README and even put your business information above the agreement to let people know where they can find more of your stuff.
How To Sell Your Sound Library Or Sample Pack
Finally, it's time to put your sound library or sample pack up for sale. You can either sell it on your own website or submit it to a retailer that sells libraries from many brands.
Some good website to look into are A Sound Effect (which sells full libraries) and game engine asset stores like Unity and Unreal (where you can stock music too).
You can submit your library to be sold on as many websites as you want and this can be anytime before or after you've launched your product.
These sites will, however, take a portion of revenue made from each sale they make.
It's kind of like a commission or royalty that only applies to the copies sold on their website.
So, you could sell it on your own website too and keep 100% of the revenue but you'll probably have to pay some percentage to a payment service like Stripe or PayPal.
Both ways to sell your sound effects have their pros and cons.
If you sell it through a retailer, you don't keep as much from each sale but you can get more sales since they may have a lot more traffic and a larger audience that can be completely different from the one you have.
Even though it may seem that all of the work is done, marketing your product is a very important step to take.
This could be as simple as talking about it and bringing it up in conservation, or as far as running ad's and promoting it on social media.
Either way, it's good to go into this with a strategy.
Remember, this is just my way of doing it. Ask yourself if there's a better way depending on the software you use.
Share this with someone you think would learn a lot from this tutorial on making a sound library. As always, thanks for reading.
Featured Post
Share!
Join the newsletter for free stuff and some knowledge too!
Everything you need. No Spam. A heads up before others do.


